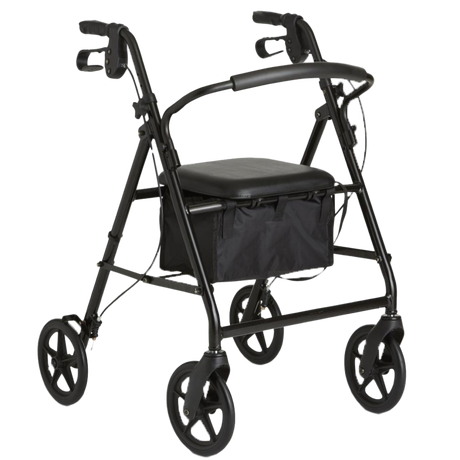
Rollator walkers can help people with declining mobility maintain their independence, stay in their current housing as they age, and complete tasks everywhere from the kitchen to the grocery store more safely. While these mobility devices can make a big difference in the lives of seniors and individuals with disabilities, they do require ongoing maintenance for safety. Tightening the hand brakes on a walker is one key maintenance task that you can’t afford to skip. In this post, we’ll teach you how.

When to Tighten the Brakes on a Walker
With regular use, all mobility devices—from wheelchairs to canes—suffer wear and tear. Over time, the brake adjuster found on rollators can loosen up and require tightening. Some signs that it may be time to tighten the brakes on your mobility device include:
- Loss of stability: Your walker wobbles or no longer supports you as well as it once did.
- Reduced responsiveness: Your walker takes longer to slow down when you activate the brakes.
- Difficulty making tight turns: Your walker can’t make a left or right turn as easily as it once did.
- Difficulty applying pressure: The brakes take more effort to operate than usual.

Tools You’ll Need to Tighten the Brakes on a Walker
Although there are differences between models, the process for tightening the brakes on most walkers is similar. For a minor adjustment, you may not need any tools at all. However, in some cases, you may need a wrench, a screwdriver, and possibly, a pair of pliers.
Understanding the Brake Components of a Rollator
Before you can tighten the brakes on a rollator, it’s important to have an understanding of the parts of the braking system. Let’s take a look at them one by one.
Hand Brakes
The hand brakes are the part of the braking system that you operate to slow your walker down and lock the wheels. There are three kinds commonly found on rollators:
- Loop lock brakes: These brakes have large loops beneath the hand grips that you squeeze to control the speed of the rollator.
- Push-down brakes: Push down brakes are built into the handlebars and engage when you push down on the grips of the rollator.
- Bicycle-style hand brakes: Bicycle brakes are levers that you squeeze to engage the brakes.
Brake levers
The brake levers are the parts of the brakes that move when you push on the handles. On most rollators, they are found only on the rear wheels.
Brake pads
Mounted on the brake levers, the brake pads are what allow the walker to slow down. They apply pressure to the rear wheels of a rollator, causing them to spin more slowly and eventually come to a complete stop.
Brake cables
The brake cables are thin tubes that travel from the hand brakes to the brake pads. When you activate the hand brakes, the cables move the brake pads, allowing the braking system to respond.

How to Tighten Brakes on a Walker Step-By-Step
The following step-by-step guide is intended for general information purposes only. Depending on what type of brakes your rollator has and how it’s designed, you may need to tighten the brakes in a different way. Before attempting to tighten the brakes on your rollator, read the maintenance instructions included with your mobility device carefully. Follow the directions written by the manufacturer for best results.
Step 1. Locate the Brake Cable Adjusters
To begin, find the brake cable adjusters on each side of your rollator. There are usually two: one located near the hand brakes and one located near the bottom of the brake cable by the wheels. On most rollators, each adjuster is a nut.
Step 2. Tighten Brake Cable Adjusters
Once you have located the upper brake cable adjuster, turn it clockwise to tighten the brakes. You can try turning the nut with your hand. If it resists, use a wrench.
When only minor tightening is necessary, you may not need to continue further. Otherwise, tighten the lower cable adjuster nut using the same process.
Step 3. Remove Slack from the Cable
In most cases, the adjustments made in Step 2 will be enough to tighten the brakes on a rollator, especially if you make regular adjustments to your mobility device. If problems persist after tightening both brake adjusters, you may need to continue on and remove slack from the brake cable.
To get started, find the fastener that holds the cable in place. It will be a screw positioned below the cable adjuster near the brakes. The type of screw varies. You may need a flathead screwdriver, a Phillips head screwdriver, or an Allen wrench, depending on the design of your walker.
Once you have a tool that matches the cable fastener screw, take the screw out. Keep it close by so that you can put it back in a minute.
After removing the screw, grip the brake cable with the pliers and pull to remove the slack from the line. While continuing to pull on the brake cable, replace the screw, tightening it with the screwdriver. You may want to have someone assist you with this step. One of you can hold the brake cable tight with the pliers while the other person screws the fastener back into place.
Step 4. Tighten the Brake Lever Screws
If Step 3 doesn’t resolve the issue, you may need to adjust the brake levers. To do so, locate the screw hardware that holds them in place. As with the cable fastener, the type of screw used to secure the brake levers varies from model to model. Use the screwdriver that matches the type of screw to tighten each brake lever.
Testing Brake Functionality
After completing each step above, take the time to stop and test the brakes. If they feel tight enough, you can stop the process. In many cases, you’ll only need to tighten the upper brake adjuster to see results. Rarely, you’ll need to continue the procedure all the way through Step 4.
If problems persist even after you’ve tightened the brake lever screws, consult the manufacturer for next steps. You may need to have your rollator professionally serviced.

Troubleshooting Common Walker Brake Tension Issues
Loose brakes aren’t the only possible problem with rollator braking systems. Read on to learn about other potential issues and what to do about them.
Squeaky Walker Brakes
Squeaking when you employ the walker brakes often indicates that the brakes or the wheels require lubrication. Without lubrication, increased friction between the brakes and the wheels can lead to squeaking. Applying a few drops of all-purpose lubricant to the brakes should resolve the problem. Refer to the usage instructions to find out what type of lubricant to use and where to apply it on your particular rollator model.
Walker Brakes That Won’t Engage Properly
If the walker brakes won’t engage properly, a loose cable may be the cause. Go through the steps outlined above to address the issue. Should the problem persist, get in touch with the rollator manufacturer.
Walker Brakes Won’t Release
If the walker brakes won’t release from a locked position, something is likely wrong with the locking mechanism. Try making adjustments to the lower brake cable adjuster. For persistent problems, consult the manufacturer, as the hand brakes may need to be replaced.
Uneven Brake Tension
If you find that one wheel on your walker slows down more quickly or that the brakes are more difficult to operate on one side, the brakes may need aligning. Loosen the brake lever screws on both sides and adjust the position of the brakes so that they are facing the same direction. Then, tighten the screws. After completing these steps, go through the brake adjustment process outlined above to set the tension.
Brake Handle Difficulties
When bicycle brakes or loop lock brakes become difficult to operate, try lubricating the parts following the directions provided by the manufacturer. A lack of responsiveness may also be caused by loosening of the brake cables, so try the tightening procedure described above. If problems persist, consult the manufacturer.

When to Replace Brake Components on a Walker
Some parts of a rollator’s braking system need to be replaced periodically to keep the mobility device working properly. How frequently you’ll need to do so depends on how much you use your rollator. The manufacturer’s maintenance instructions should provide information about how many miles your walker can travel before the brake pads and other parts will require replacing. If you can’t find this information, contact the manufacturer.
Because you rely on your rollator to help you safely navigate your home while aging in place, it’s important to inspect it regularly even if you’re not experiencing any problems with it. Look for signs of wear and tear like thinning spots or tears on the brake pads and worn spots on the brake cables. When you notice obvious wear and tear, replace the affected parts regardless of how old they are.
In need of a new rollator? Check out the selection of rollator walkers available at Because Market.